


Embroidering on knit hats can be difficult, but as a follow-up to my first article in this series, it only made sense to tackle one of the top textured garments for the coming cool weather. Beanies, toques, knit caps, or whatever you prefer to call them, are frequent subjects of conversation among new digitizers and embroiderers, and it’s easy to understand why. They are stretchy, their ribbed texture is extreme, and unsupported stitches sink into the depth of the material, never to be seen again. They swallow small text and details, cause designs to lose registration as they shift in the hoop, and break up the coverage of fills with their thick, heavy ribs. Even so, if one can hoop correctly and digitize with compensation and structure, even these hats can come out looking clean.
First and foremost, let’s address that stretch.
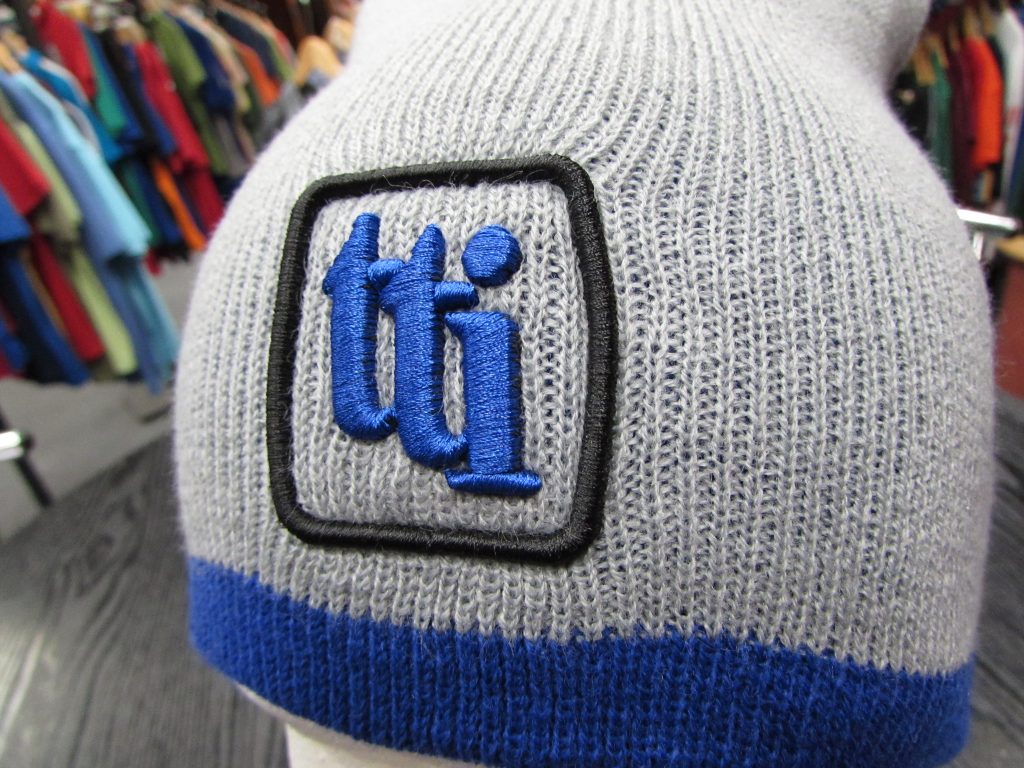
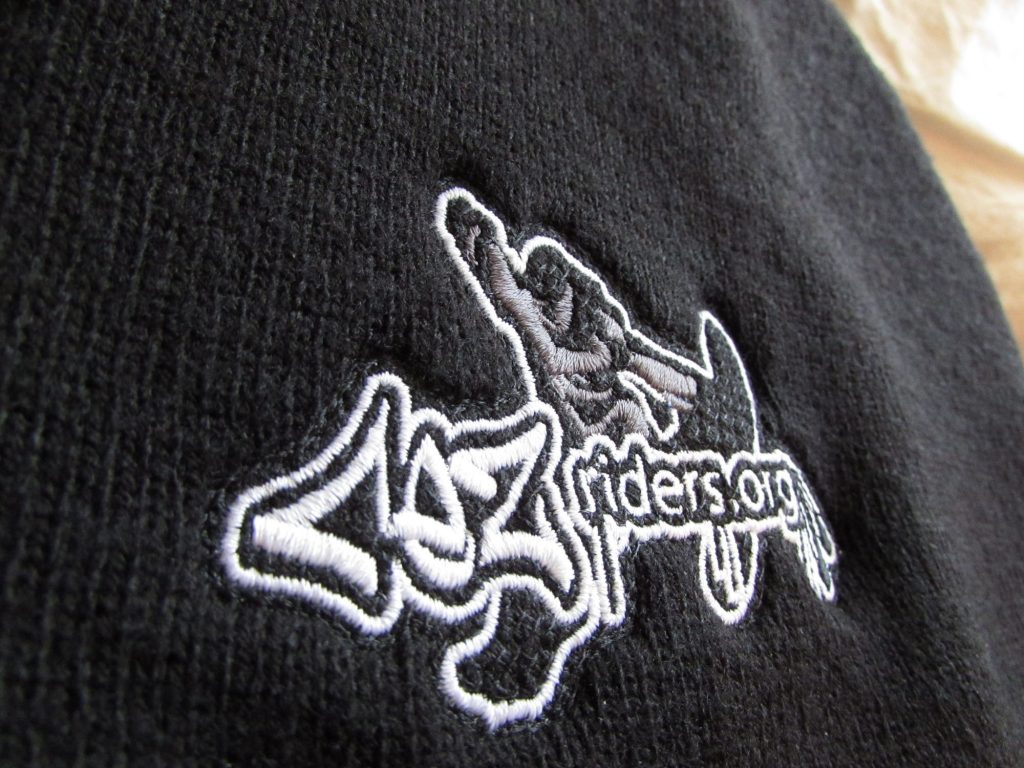
On this sales sample, you can see how hooping without stretch means that ribs are trapped under the design, and the design distorts under tension.
Registration errors almost always come from the material of a given garment warping, stretching, or moving in the hoop. Most decorators intuitively know this, and attempt to arrest the movement of the work piece. Sadly, this usually means that desperate decorators tend to over tighten hoops and stretch their knits far beyond any natural level they should see or by adding layer after layer of stabilizer beyond what is necessary. While we all understand that a card-board thick layer of stabilizer is not a great idea for a piece destined to be in direct contact with someone’s forehead, the tendency to stretch knit hats far more than they should when hooping. If you consider that as you stitch your design, you are permanently marrying the material to the stabilizer in the hat. If you have over-stretched your knit hat beyond the level of stretching it will see on a human head, you’ll find that as soon as you release the hat from the hoop, the extra material you’ve stretched out from the center will attempt to return to its original state, meaning that ripples, waves and wrinkles in the material all crash back into the stitched-down area of the design, ruining the look of the cap.
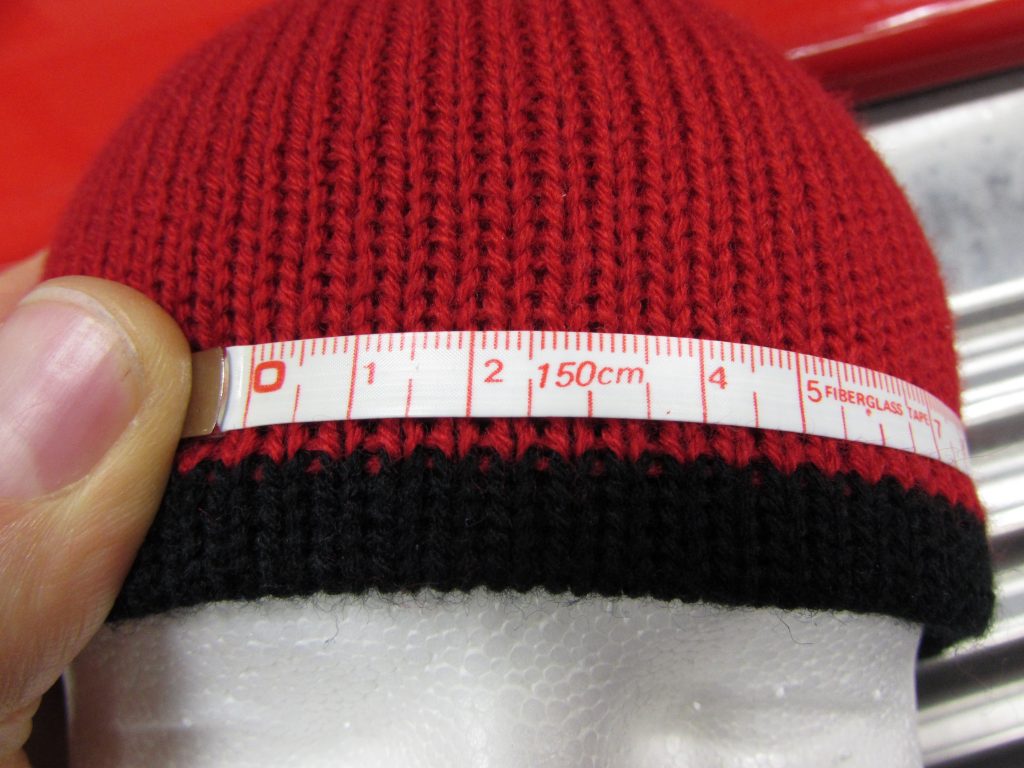
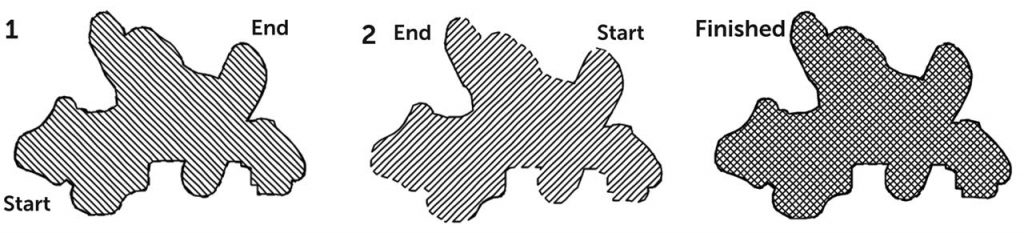
Measure across the counted ribs, then match that distance when you hoop.
Measure and Match
The solution is to measure and reproduce your stretch. Though you can’t know the size of every head, you can uniformly set and recreate an amount of stretch that makes the knit hats look their best when worn. If you have a mannequin handy for hat display or a coworker with an averagely-sized noggin, it doesn’t take long to set your scale. You’ll be using a standard number of ribs in your ribbed knit to measure the amount of stretch you get when hooping your knit cap. Let’s go with 8 ribs: grab your measuring tape, place the cap on the mannequin head or willing accomplice and measure from ribs 1-8. Examine it so that you can get a feel for the amount of space between each rib. Now, when you hoop, attempt to get the ribs stretched to a point where they are about the same distance apart as they were on the head; you’ll be able to take your tape measure and compare the 8 rib distance you recorded to the amount of stretch on the hoop to verify. That said, this will eventually become second nature; this measuring is just to help you get your bearings. Your embroidered hat may not lay perfectly flat when it isn’t worn, but on the head, you’ll find the logo hasn’t tied up too much of the fabric and caused warping or pinching where the embroidery area is stitched in place with the underlying material in its unstretched state.
This measuring tip works for other stretchy materials that you can measure on a model; you can make a couple of marks with pins, chalk, or a disappearing fabric marker and execute the same test.
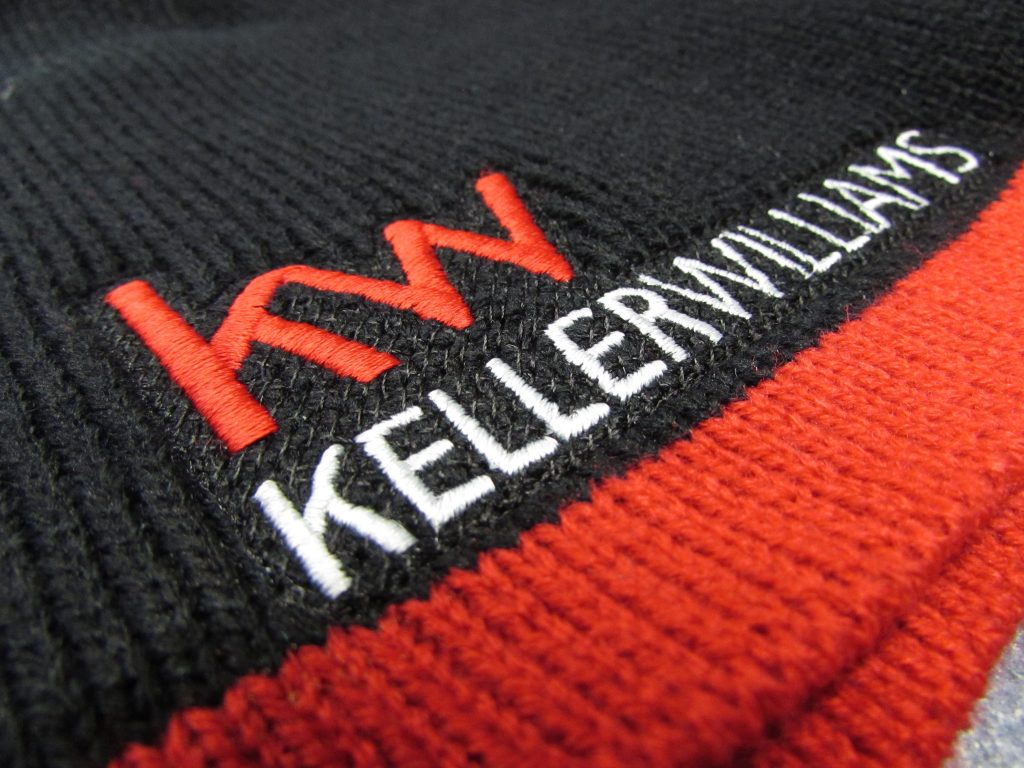
Even thin unsupported letters look incredibly clean with the light mesh fill underlay.
Start with Structure
Dealing with stitch quality is done much the same as I explained in the previous installment. If you don’t digitize, you’ll likely have to enlist the help of someone who does, but it’s worth the trouble to have your knit hat running right from moment one. Knit hats lack stability; knowing that, we can work toward creating stability and fighting against the severe ribbed texture that tends to pull apart our designs and allow elements to sink in to the lofty thickness of the knit. Underlays that build structural foundations and tie the hat to the stabilizer can help.
Large lettering pieces and satin stitch logos are fairly simple to save, provided the strokes in these lettering elements are wide. Adding edge or contour underlay at the bottom level, followed by a zigzag or double zigzag will both hold down the underlying material, keep it from shifting, and lift the top stitching above the ribs like little bridges. When in doubt, use an underlay that crosses the valleys’ between the ribs, and offset it from the direction of the top stitching for the best effect. The edge-bolstering edge-walk in combination with the angled double zigzag is enough to enhance edge quality and stop stitches from ‘sinking in’ even on the thickest rib knits.
The ‘Light Mesh Fill’ described below can be created simply with 2 overlapping fills at opposed angles.
Designs with open areas, detailed outlines, text with no supportive background fills, can do well with the ‘light mesh underlay’ discussed in my last article. For full details on how to achieve it, I suggest you read part 1. That said, the process is easy and a lot lighter than fully filling the background of your design with stitches. Using a structural light mesh fill will eliminate your need for specialty toppings like water soluble film and leave you with a cool ‘debossed’ effect, wherein the background of your design sinks in to the cap. All it requires is a shape larger than your design, two stacked, 2mm (20 point) density, 4mm stitch length fills at 15 and 135 degree angles, and you are good to go. For all the details, head back to part 1.
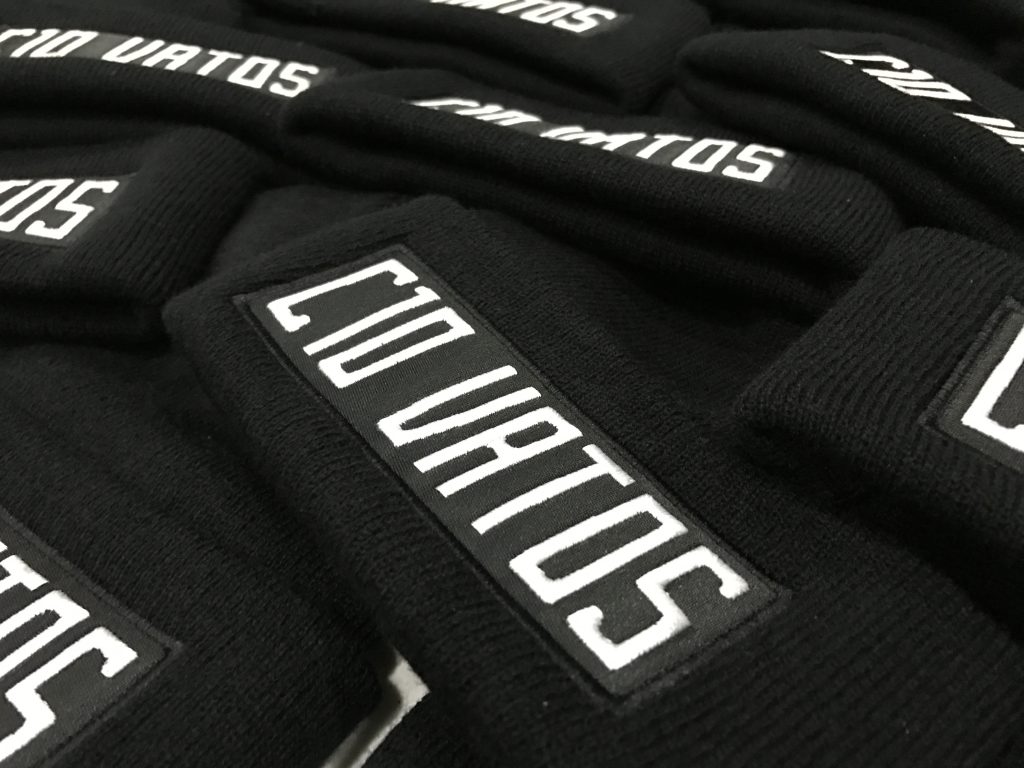
This patch beanie by RJ Silva of Eyekandy Designs looks clean due to it’s applique style.
Applique and Patches
You may not want to embroider these knits at all. If you have a large, fully filled logo with a big background slab, or your customer wouldn’t mind if you did, consider stitching your logo on a patch or applique and then applying it to your knit cap. The reasons for this are two-fold: First, you’ll avoid just about all of the problems direct embroidery on knits can cause. Second, knit caps stay warm due to the air they trap in the lofty structure of the knit material; in the case that your knit cap isn’t the kind with a roll-up cuff, embroidery directly on the cap, particularly with a fully filled logo, can crush the knit, making the decorated area of your otherwise warm cap into a flat, cold slab. There’s nothing like putting on a decorated knit cap only to find the wind slicing through the filled logo area and freezing your forehead. I know from my own testing in the Sandia Mountains in winter- it’s no fun.
The steps for this technique are just like any other applique or patch, with the exception that on an applique, you’ll be hooping and stitching the logo material on the applique before prepping it for this application. For this usage, you can think of it like a cap without the final finished edge. For either option, after hooping your knit cap with the measured amount of stretch, you’ll be running a line of placement stitching just smaller than your applique or patch, placing your piece with a light adhesive, then stitching it down for permanent attachment. If you are using a finished-edge patch, you can use a simple doubled run of straight stitches inside the inner edge of the patch border. For a raw edge ‘applique’ patch, you’ll want to use a tackdown stitch to hold the applique in place; I favor 3mm spaced zigzag just narrower than the final edge, followed by a full density satin stitch that covers the edge entirely. GO with at least 3mm to make sure you fully capture the edge of the applique and avoid unraveling of the edges. For more information about creating patches, check out my previous article on patch making, and for more on applique, the piece linked here will help you get started no matter your equipment.
All in all, knit caps are actually not that hard to stitch if you do the prep work needed to know your knit, give your design the proper foundation, and use the best application to get your design on your cap without compromising its function. With all that in mind, you’ll be able to kick out some cozy knits before the weather even gets cold.
Just read the 2nd part of embroidering on knit caps. Wow! Thank you for the easy to understand post. I am new at this and really appreciate what you’re doing. I will go to part one now I know I will learn a lot from it. Mimi
You saved me with this idea! It worked beautifully!!!! I am so glad I came across your expert advice! Thank you so much for writing it!

Just staring you make it seems so easy and I uderstand what your saying read at lot of how to websites.Yours is the best. Thank You.