


My good friends from Images Magazine UK asked me to write a short piece on the ins and outs of machine embroidery hooping. If you are new to machine embroidery or just have some basic questions on getting material prepped for the embroidery machine, you can read the print version here. That said, if you want a bite-sized overview, read on!
It’s no surprise to any embroiderer that hooping is a fundamental skill that we all have to attend to if we want reliably good results from our embroidery. The embroidery hoop, in concert with stabilizers, keeps our work pieces solid. The hoop helps our decoration area resist movement and stretching, fixing the area firmly for the embroidery process. To combat the natural stresses of embroidery, good hooping is a necessary first step.
Basic Hooping Tips
There are several elemental tips that this article has to share:
Use the smallest hoop in which your design reasonably fits.
Though we should be mindful of the allowance we need for our presser feet not to hit the hoop, it should still be as small as possible. The more material in the hoop, the more distortion and shifting we are likely to see.
Don’t overstretch your garment.
(This is one of the most common mistakes in machine embroidery hooping.)
Though a firm, smooth surface is desirable, stretching garments beyond the amount they’ll stretch when worn causes distortion. As a design is stitched, it traps the material underneath it in a stretched state. When you release an overstretched garment, the loose fabric around the design recoils and puckers.
Adjust hoop tension
Make sure to keep tension firm and adjust your hoops for thinner materials and stabilizer combinations. If the material slips and shifts, you will have registration problems and puckering. Unless you use magnetic hoops (more on that later) hoop tension isn’t a ‘set it and forget it’ affair.
Tools of the Trade
Machine Embroidery Hooping Fixtures
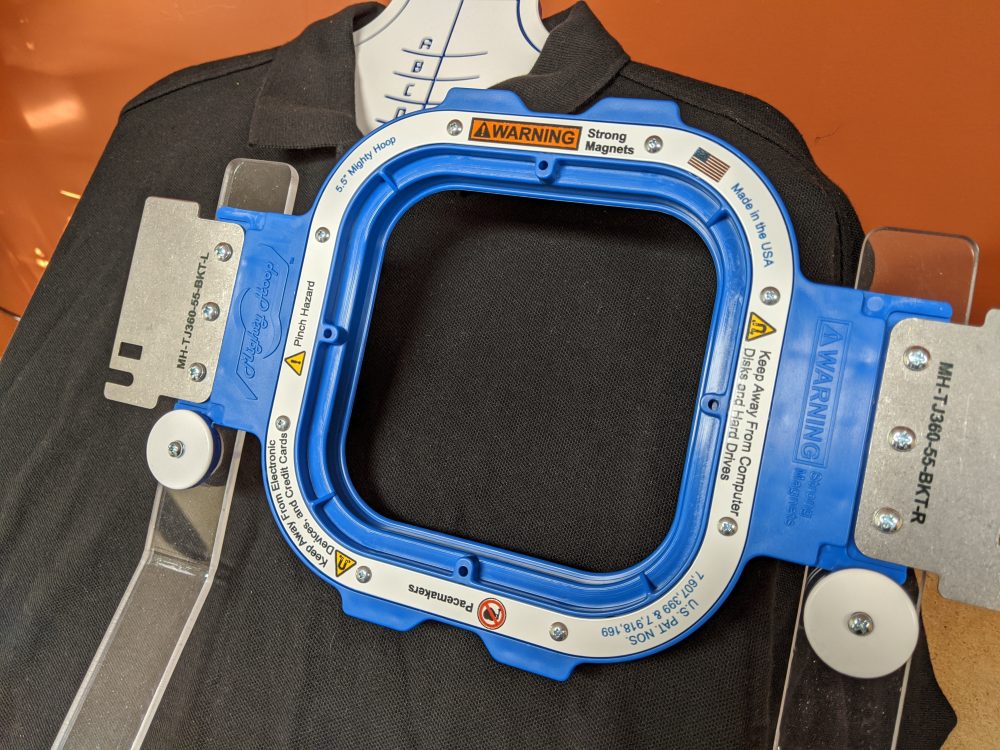
The second half of the article covers the virtue of specialty fixtures like hooping stations and guides. In short, customers like reliable outcomes and hooping stations allow you to record and reproduce logo placements on garments as well as assist you in keeping your hoop straight. (Reliable outcomes are so important that I even did an episode on my show, The Takeup, where I got in to hooping aids and processes – Episode 24, Process and Efficiency) Moreover, if you want to use magnetic hoops, their tendency to lock in and jump together from a distance means that hooping with a fixture that securely holds garment, stabilizer and hoop will make for fewer ‘premature’ closures. That said, even with old-school tubular hoops, the secure, easy-to position nature of a proper fixture makes it incredibly useful.
Hoop Styles
In the opening of the article, I also define common hoop types and give pros and cons for each; with the bulk of that discussion being a quick debate between standard tubular hoop and their magnetic equivalents.
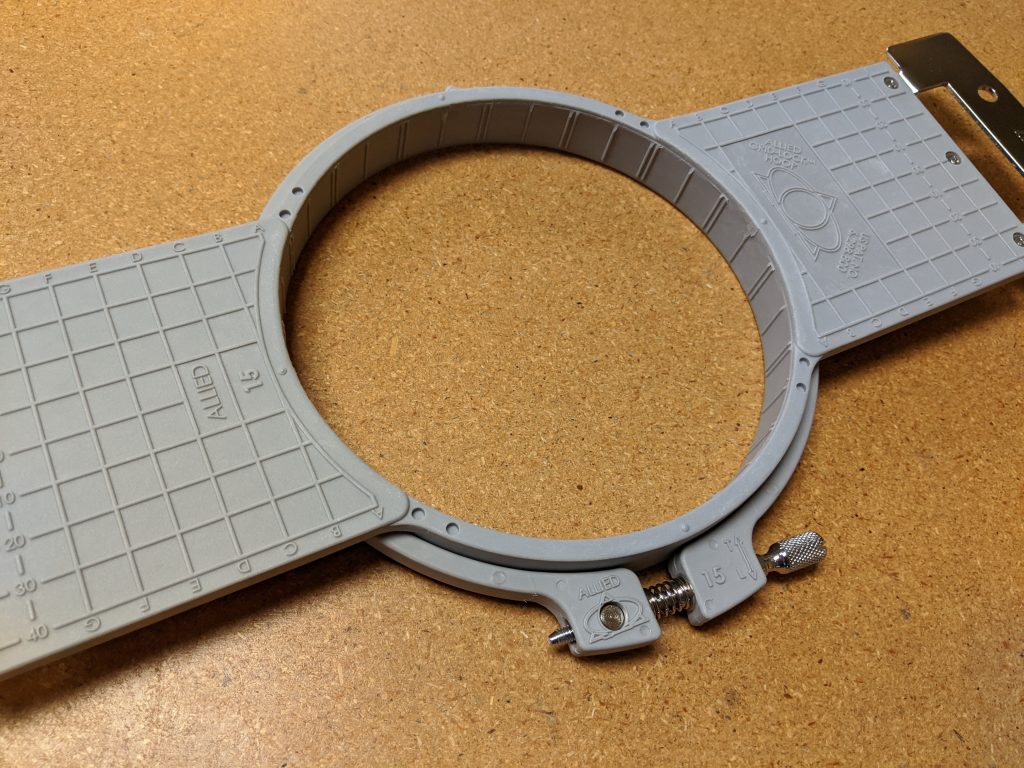
I choose both.
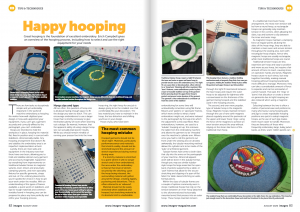
For me, the solution isn’t one over another as much as which should be your default set, and what task are they best suited to perform. To my mind, magnetic hoops are fantastic for providing even hoop tension without sagging or loose spots on square or rectangular field hoops. They excel in factory-line decoration wherein standard garments can be easily slipped over a hooping station and addressed. They also provide great tension and security on difficult, large jacket backs and materials that slip in the hoop. Where they can fall down is finicky items that require careful repositioning and adjustment, or those that can’t be easily worked with even on a freestyle hooping arm. Traditional hoops allow more finesse , though they can suffer from difficulties with slippery, thick, or unevenly seamed material. If your placement is exceedingly difficult or hard to get a straight angle of attack, the traditional tubular hoop can let you unhoop, adjust, and reposition with a bit more ease. That said, I’m not a fan of rectangular or square traditional hoops- if possible I stay with classic rounds, as square hoops tend to have slippage and looseness in the sides while the corners are firmly held.
If you’d like to know more about:
- Basic hoop types and why people use them
- The right size and type of hoop to use for your design
- The most common mistake embroiderers make when hooping a garment
- How and why machine embroidery hooping aids and jigs can improve your output
Check out the full-length article below for more information!

THANK YOU AGAIN FOR THE EDUCATION . PRINTED IT OFF BECAUSE I LIKE A HARD COPY TO REFERENCE. ITS QUICKER FOR THIS OLD GAL